Hello, mayors! It’s time to talk about Cities: Skylines, an ultra-popular game that requires your engineering skills as well as economic skills. In this city-building simulation game, your goal is to become the most successful mayor with the most satisfied citizens.
You are wondering how this is possible? Just follow our pieces of advice, and you will learn how to run a city successfully. Today we will talk about assets in Cities: Skylines, more precisely how to make assets. It’s always fun to put in the game what we’ve always wanted, but no one before us has thought of making it.
What are Assets Types?
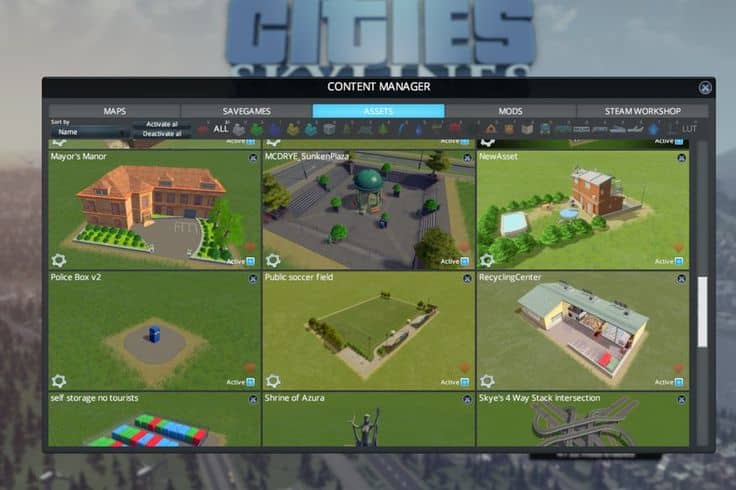
These are parks, trees, vehicles, citizens, buildings, and intersections. Buildings are located on a grid in the editor, where each tile is called a cell. The size of one cell is 8m x 8m, and the max size for automatically spawned buildings is 4×4 cells. For manually placed buildings max size can be 15×9, 16×8, 13×12, 14×11, 11×14, 12×13, 8×16 or 9×15 cells.
If you import some assets like trees, they will automatically sway in the wind. If you want to put some assets as citizens, remember that some citizens are only available in some themes. These custom-made citizens also spawn randomly with the same logic as citizens from the base game.
Also Read: How to Fix Sewage Backup in Cities: Skylines?
What is Asset Editor?

You can find the Asset Editor in the Main Menu, under the Tools tab. The Asset Editor is a tool used to create new assets or decorate existing ones.
Before creating your own asset, you can choose one of the already existing asset types using its template. For example, if you choose Vehicle as your asset type, you will be able to upload a 3D model of the vehicle you want to put into the game.
You can select the New Asset option in the Asset Editor, where the thematic menu will open. Here you can choose an asset template, for example, tropical, winter, or European. Themes are mainly a visual addition and will not affect the behavior of the asset.
When you select the desired theme, a menu will open with different types of assets to choose from. When you select the template of an already existing set, you can select the option “Use existing decoration,” where the already existing decoration will appear.
The next step is to choose a custom model (.fbx file format) or an already built-in model from the template. You can rotate the model, scale it, or move its pivot to the bottom center in this step. The usual setting is that the scale model is set to 100.
Also, with the mouse, you can view the selected model from different directions. And if you select the “maximize” button, a large preview window will open for even better insight into the model’s appearance. For example, if you are interested in what your model would look like if it were affected by a fire. Cool, right?
Decorating Assets in Cities: Skylines

The next step refers to the decoration tool. Here you can insert trees or props on the asset to make it look much nicer. That way, the asset can be a much more personalized look. Also, with preview tools, you can view the asset in daylight or at night. And if you chose a winter theme, you can see what the asset would look like if it snowed.
If you want, you can supplement buildings with sub-buildings that will be placed next to the main asset. You can add sub-buildings by clicking on the Add Sub-Building option located in the bottom right corner.
You can save a custom-made asset from the menu located at the top right or click the Esc key. This way, the asset will become playable in the game, and you will be able to find it in the same category where the template is at the beginning of creating the asset.
Also Read: How to Get Raw Materials in Cities: Skylines?
Assets Specifications
When it comes to modeling, the modeling software used is important. The System Units of this software should be 1 unit = 1 meter. Your model must be one single object and must use one material. Also, a good floor height should be 2.5 to 3 meters. Furthermore, be careful when building tall buildings. For example, if a building has many floors, the floor height should be scaled down. Otherwise, in-game cameras will make it difficult to monitor this building and align it with the rest of the street.
In addition, some custom models can get very distorted when viewed from a distance. This happens because the Cities: Skylines game automatically generates a low poly version (LOD) of the model and texture to save resources. This can be easily solved by providing your own low poly version of the model and naming it yourModelName_lod.fbx
The usual size structure for the LOD models is 128 x 128. Also, the limit for growable assets is 100 triangles; for monuments and some more significant buildings, it can be higher than 200. For vehicles and props, use about 50 triangles. It is important to pay attention to these settings as they affect game performance. Of course, there are still many settings for editing assets, but this is the most basic and most important.
Also Read: How to Change Direction of One Way Roads in Cities: Skylines?
Final Thoughts
This is a concise introduction to how to create custom assets for your Cities: Skylines game. Assets can be a visually great addition that will be different from the default buildings, citizens, or trees, for example. Assets, in a way, fulfill the wishes of players who want to have something in their game that has not been added so far.
It can be a vehicle or some building, and this is the right time to try your hand at making your own assets. Assets are not hard to make; just follow our tips, and if you prefer a tutorial via video, go to the Steam official site Cities: Skylines game, where you can find videos on making your own assets in the game. Feel free to share ideas for assets in your game with us!


